 Pin
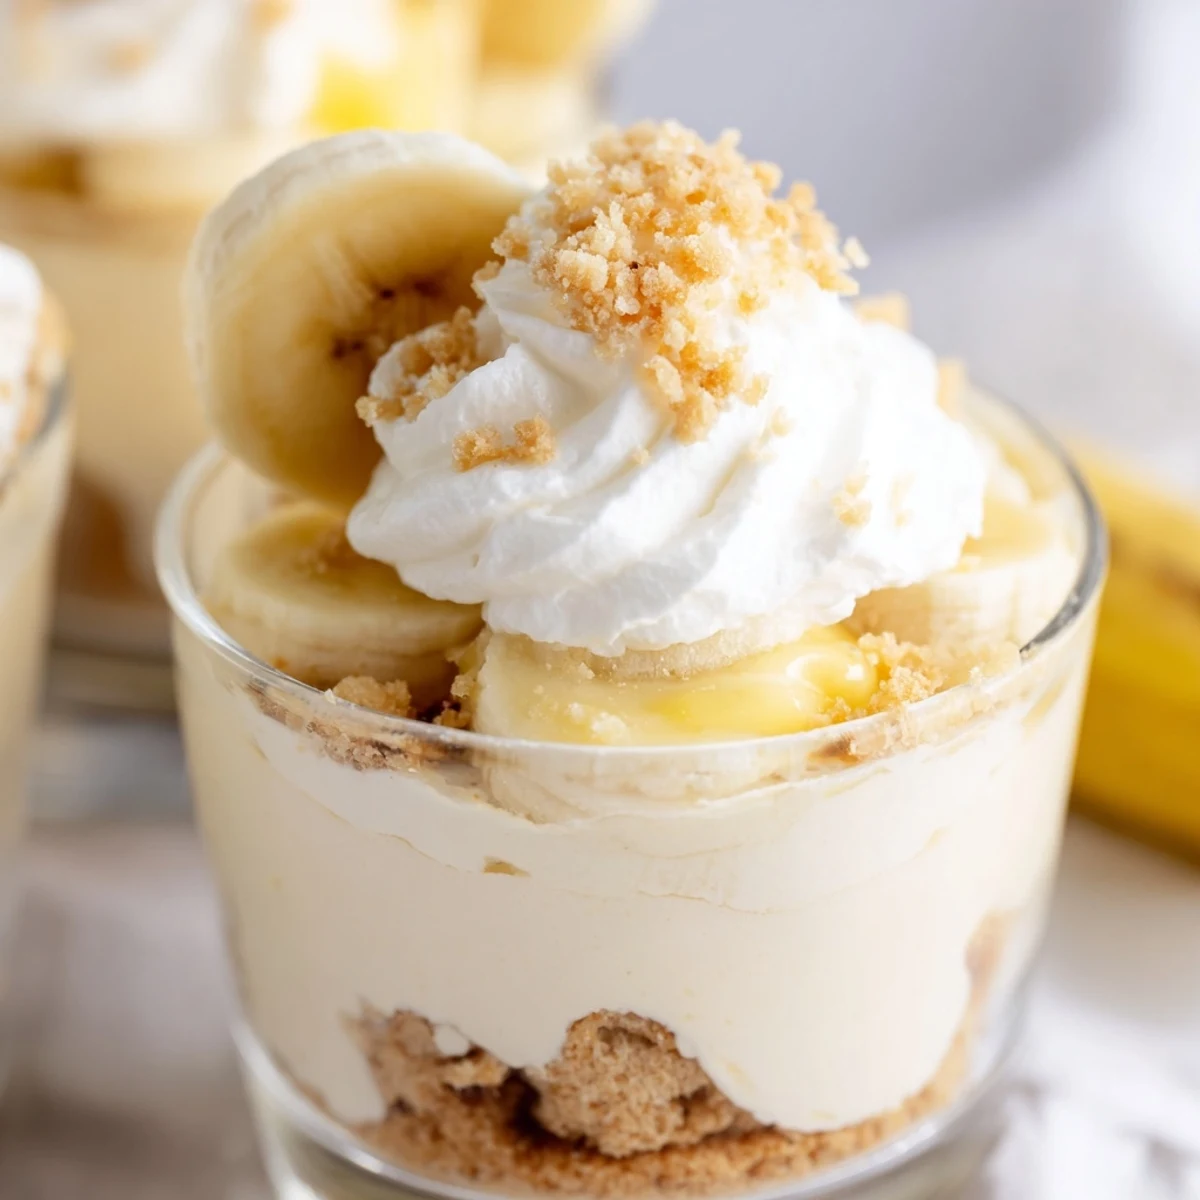
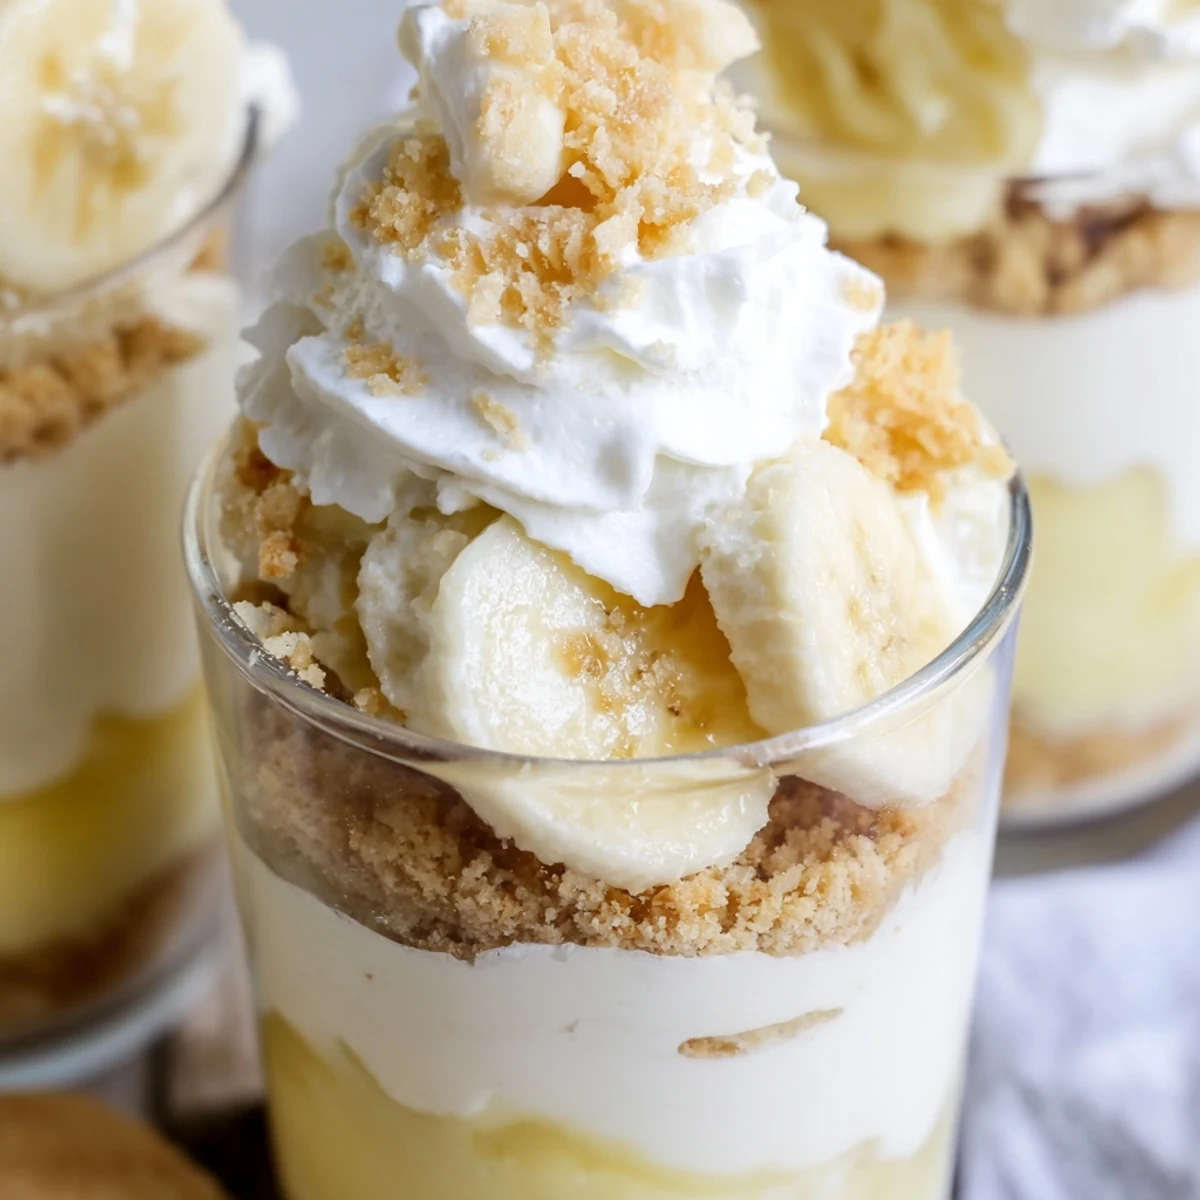
Pin These individual cups combine the best of two beloved desserts—creamy cheesecake and classic banana pudding. The no-bake preparation makes them incredibly convenient, requiring just 20 minutes of active time before chilling to set. Each cup features a buttery vanilla wafer crust, followed by layers of velvety cheesecake filling, fresh sliced bananas, and smooth banana pudding. The finishing touch includes additional wafer crumbs, more banana slices, and optional whipped cream.
Perfect for entertaining or meal prep, these cups can be made up to 24 hours in advance. The individual portions make serving effortless, while the combination of textures—crunchy crust, creamy fillings, and fresh fruit—creates a satisfying dessert experience. Keep sliced bananas from browning by tossing lightly in lemon juice before layering.
Last summer, my neighbor brought these little cups to our block party and they disappeared in minutes. I stood there watching people go back for seconds, trying to decode what made them so impossibly creamy. The secret turned out to be layering cheesecake filling with banana pudding—a combination I'd never thought to attempt but now can't stop making.
I made these for my daughter's birthday instead of a traditional cake, and she told me it was the best dessert she'd ever had. Something about having your own perfectly portioned cup feels like such a treat, and the layers look so impressive when you spoon into them.
Ingredients
- 1 cup vanilla wafer cookies, crushed: These create the classic banana pudding flavor foundation—pulse them in a food processor for the finest texture
- 2 tbsp unsalted butter, melted: Just enough to bind the crumbs together without making them soggy
- 8 oz (225 g) cream cheese, softened: Room temperature is non-negotiable here—cold cream cheese will leave you with lumpy filling
- 1/3 cup granulated sugar: This sweetens the cheesecake layer without overpowering the banana flavor
- 1 tsp pure vanilla extract: Real vanilla makes such a difference in no-bake desserts where there's no heat to mellow the flavors
- 1 cup heavy whipping cream, cold: The colder the cream, the faster it whips and the more stable your layers will be
- 1 (3.4 oz/96 g) package instant banana pudding mix: Do not use cook-and-serve pudding—it won't set properly without heat
- 1 1/4 cups cold whole milk: Whole milk creates the richest pudding layer, though 2% works if that's what you have
- 2 ripe bananas, sliced: Look for bananas with some brown spots—they're sweeter and blend better with the creamy layers
- Additional vanilla wafer crumbs: For that perfect crunchy crown on top
- Fresh banana slices: Add these right before serving so they don't brown
- Whipped cream (optional): An extra dollop never hurt anyone
Instructions
- Build the crust foundation:
- Mix the crushed vanilla wafers with melted butter until every crumb is coated and the mixture holds together when squeezed. Divide about 2 tablespoons into each of 6 serving cups and press down gently with the back of a spoon to create an even base.
- Whip up the cheesecake layer:
- Beat the softened cream cheese, sugar, and vanilla until completely smooth with no lumps remaining. In a separate bowl, whip the cold heavy cream until stiff peaks form, then gently fold it into the cream cheese mixture until fully incorporated.
- Prepare the banana pudding:
- Whisk the instant pudding mix with cold milk for exactly 2 minutes—it will seem thin at first but will thicken beautifully as you whisk. Let it sit for about 5 minutes while you assemble the first layers.
- Start layering like a pro:
- Spoon half the cheesecake filling over the crust in each cup, smoothing the tops with a small spatula. Arrange a layer of fresh banana slices over the cheesecake, then divide the pudding evenly among all cups.
- Add the final touches:
- Top each cup with the remaining cheesecake mixture, then sprinkle generously with extra vanilla wafer crumbs. Cover and refrigerate for at least 2 hours, adding fresh banana slices and whipped cream just before serving.
 Pin
Pin My husband originally claimed he didn't like banana pudding, but after trying these cups, he asked me to make them for his office potluck. Now he's the one suggesting we have them for dessert, and I've caught him eating them for breakfast more than once.
Making These Ahead
You can assemble these cups up to 24 hours in advance, which makes them perfect for dinner parties or holiday gatherings. Just wait to add the fresh banana slices and final wafer crumb topping until right before serving—otherwise those top bananas will turn brown and the crumbs will lose their crunch.
Serving Suggestions
Clear glass cups or mason jars show off these beautiful layers best, letting everyone see what's coming. I've also served them in vintage teacups for bridal showers and in small mason jars for casual backyard barbecues—they somehow look fancy no matter what vessel you choose.
Getting The Texture Right
The magic happens in the folding step—when you incorporate the whipped cream into the cream cheese mixture, use a gentle hand to keep all that air you just whipped in. Over-mixing will deflate the cream and your layers won't be as light and fluffy as they should be.
- Use a rubber spatula and fold from the bottom up
- Stop as soon as no white streaks remain
- The mixture should feel airy and mousse-like
 Pin
Pin There's something so satisfying about digging your spoon through all those layers and getting a bit of everything in one bite. These little cups have become my go-to dessert for bringing smiles to any table.
Recipe FAQs
- → Can I make these cups ahead of time?
-
Yes, these cups can be prepared up to 24 hours in advance. For best results, add fresh banana slices and whipped cream topping just before serving to prevent browning and maintain texture.
- → What type of cups work best for serving?
-
Clear glass dessert cups, mason jars, or small parfait glasses work beautifully as they showcase the attractive layers. Any 6-8 ounce individual serving vessel will work perfectly.
- → How do I prevent the bananas from turning brown?
-
Toss sliced bananas lightly in lemon juice before layering to slow oxidation. Alternatively, add banana slices just before serving. The pudding layer also helps protect bananas from air exposure.
- → Can I use homemade banana pudding instead of instant?
-
Absolutely. Homemade custard-style banana pudding works wonderfully. Allow it to cool completely and thicken properly before layering to prevent the cheesecake filling from becoming runny.
- → How long do these need to chill before serving?
-
Refrigerate for at least 2 hours to allow layers to set properly. For optimal texture and flavor, chilling for 4 hours or overnight helps the flavors meld together beautifully.
- → Can I freeze these cheesecake cups?
-
Freezing is not recommended due to the fresh banana content and pudding texture, which can become watery when thawed. These are best enjoyed fresh from the refrigerator within 2-3 days.