 Pin
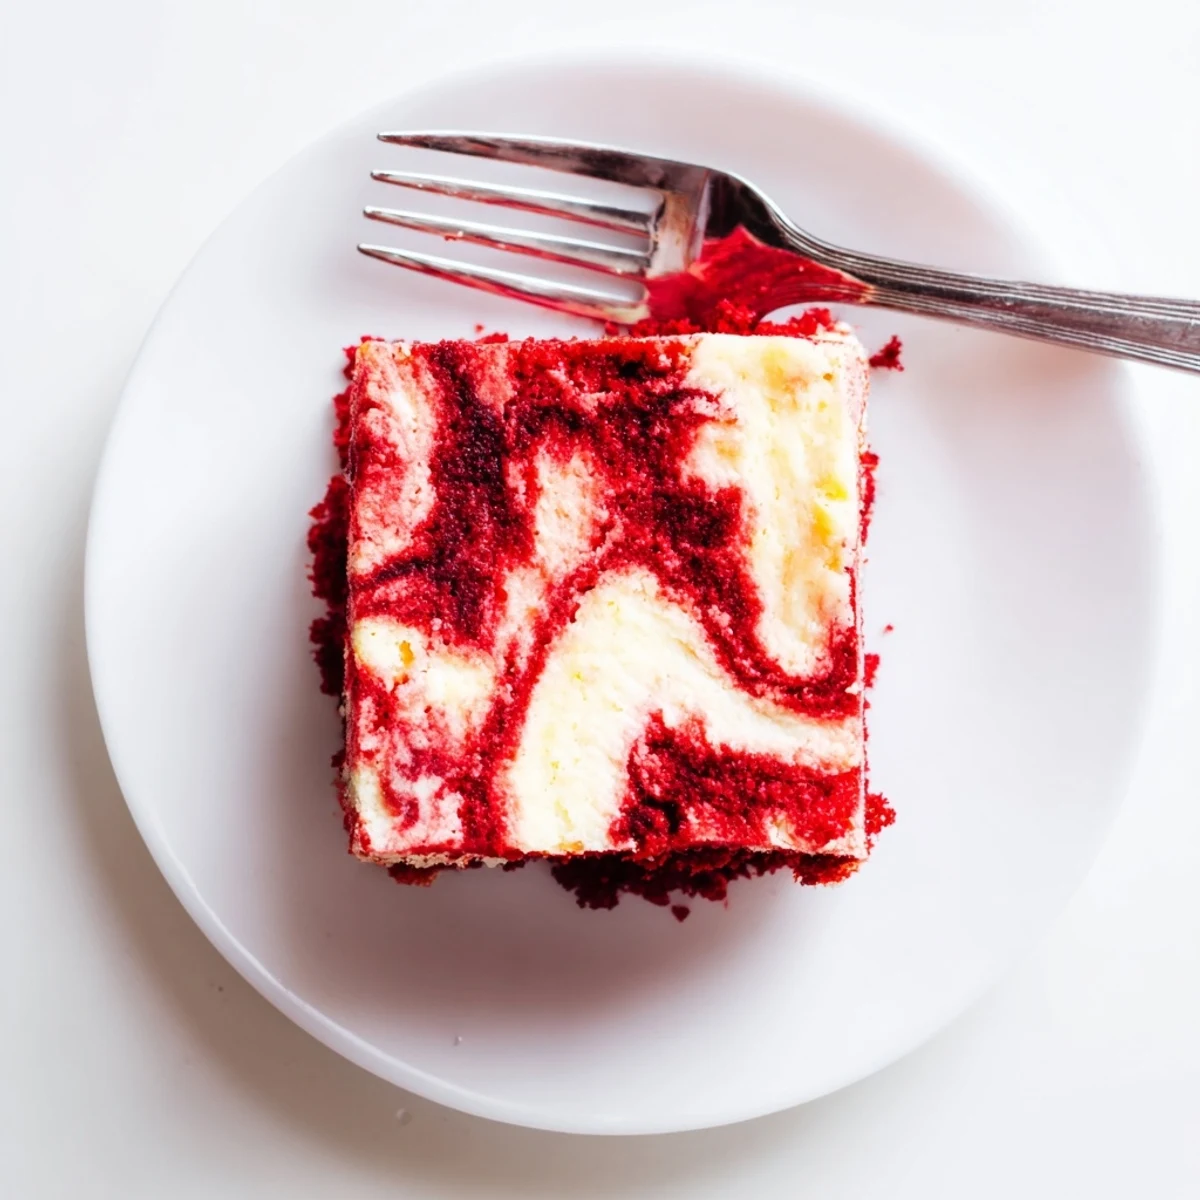
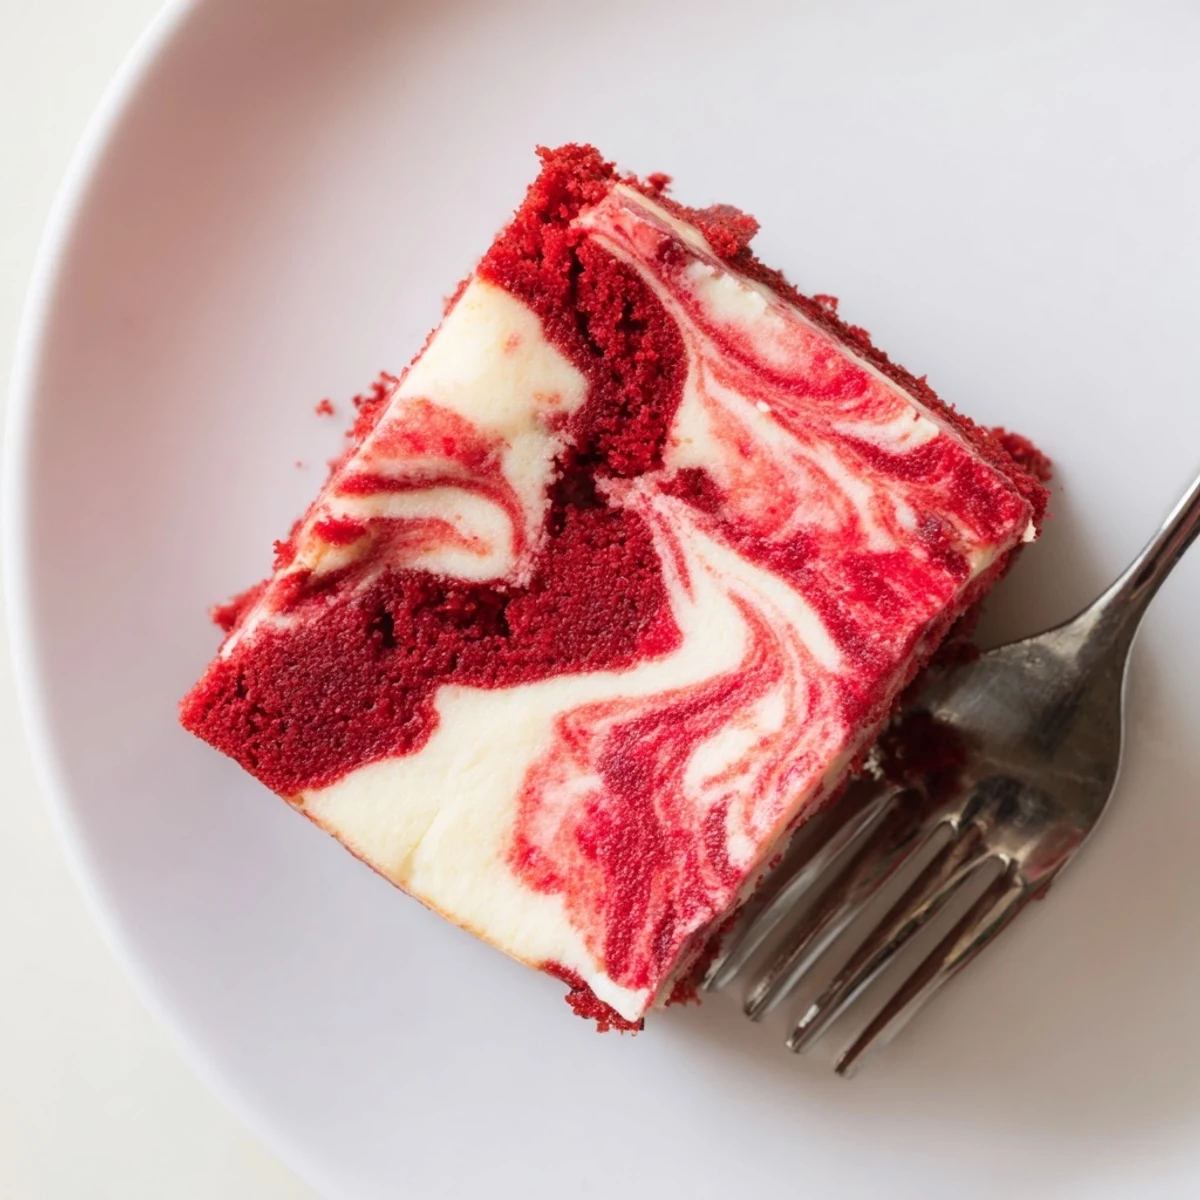
Pin This stunning marbled dessert combines the classic appeal of red velvet with rich, creamy cheesecake filling. The vibrant crimson cake provides a tender, moist foundation perfectly balanced by sweet tangy cheesecake ribbons swirled throughout. Ready in just over an hour, this American-style treat yields twelve generous servings, making it ideal for birthdays, holidays, or special gatherings. The marbling technique creates beautiful visual appeal while ensuring every bite delivers both velvety chocolate undertones and smooth cheesecake creaminess.
The marbling happened by accident the first time I made this, when I was running late for a friend's birthday and didn't fully combine the cheesecake layer into the red velvet. Everyone kept asking about the beautiful swirl pattern, not realizing it was actually my kitchen chaos turning into something gorgeous.
I brought this to my sister's baby shower last spring, and my aunt who never eats dessert went back for seconds. Later she cornered me in the kitchen for the recipe, writing it down on the back of a napkin while everyone else was playing games.
Ingredients
- 2 cups all-purpose flour: Sifted if you have time, but straight from the measuring cup works fine too
- 1 ½ cups granulated sugar: This is the sweet spot, but some friends like it with 1 cup for a less sugary slice
- 1 tsp baking powder and ½ tsp baking soda: Fresh leavening makes all the difference in the rise
- 1 tbsp unsweetened cocoa powder: Just enough to give that classic velvet depth without making it chocolate cake
- ½ tsp salt: Balances everything out and brightens the red color
- 1 cup buttermilk: Room temperature creates the tenderest crumb
- ½ cup vegetable oil: Keeps it incredibly moist for days
- 2 large eggs: Also at room temperature for even mixing
- 2 tsp vanilla extract: Use the good stuff if you can, it really shines here
- 1 tsp white vinegar: Reacts with the buttermilk and baking soda for extra tenderness
- 2 tbsp red food coloring: Gel coloring gives that professional looking red without thinning the batter
- 8 oz cream cheese: Completely softened is non negotiable for silky smooth swirls
- ⅓ cup granulated sugar: For the cheesecake layer, sweetened just enough to complement
- 1 large egg: Creates the perfect creamy cheesecake texture that bakes through
- 1 tsp vanilla extract: Because vanilla makes everything better
Instructions
- Get your oven ready:
- Preheat to 350°F and grease a 9x13 inch pan, then line it with parchment paper that hangs over the sides for easy lifting later.
- Whisk the dry ingredients:
- In a large bowl, combine the flour, sugar, baking powder, baking soda, cocoa powder, and salt until everything looks uniform.
- Mix the wet ingredients:
- In another bowl, whisk together buttermilk, oil, eggs, vanilla, vinegar, and food coloring until the color is perfectly consistent.
- Combine batters:
- Pour the wet into the dry and fold gently, stopping the moment you no longer see streaks of flour.
- Spread the velvet:
- Pour the red velvet batter into your prepared pan and use a spatula to create an even layer.
- Make the cheesecake swirl:
- Beat the softened cream cheese until smooth, then add the sugar, egg, and vanilla until the mixture is silky and lump free.
- Create the marble:
- Drop dollops of cheesecake mixture over the red velvet, then drag a knife through in figure eight motions just until it looks pretty.
- Bake until perfect:
- Bake 45 to 50 minutes, checking that a toothpick comes out mostly clean with maybe a tiny bit of cheesecake clinging to it.
- Patience pays off:
- Let it cool completely in the pan before slicing, or the swirl pattern will smear and the texture will be slightly gummy.
 Pin
Pin My now husband requested this for his birthday the first year we were dating, and I panicked so much about the swirl pattern looking perfect that I made three practice cakes that week. The fourth one went into the oven with a shrug and turned out better than all the others combined.
Making the Swirl Actually Swirl
The trick is not to overthink the marble pattern. I used to agonize over creating perfect loops, but the prettiest swirls happen when you drag the knife through just four or five times and walk away.
Room Temperature Matters More Than You Think
When I rushed this cake with cold eggs and buttermilk once, the texture turned out slightly dense in spots. Now I pull everything out at least an hour before baking and the difference in crumb structure is remarkable.
Serving and Storing Like a Pro
This cake actually tastes better the next day, when the flavors have had time to get friendly with each other. The cheesecake mellows into the velvet and creates this incredibly smooth, balanced sweetness that hits different.
- Dust with powdered sugar right before serving for that bakery finish
- Chill for an hour before slicing if you want perfectly clean edges
- Store covered in the fridge and let slices come to room temperature for 10 minutes before eating
 Pin
Pin There is something genuinely magical about cutting into that first slice and seeing exactly how the swirl landed, like opening a tiny present you baked yourself.
Recipe FAQs
- → How do I achieve the perfect marble swirl?
-
Dollop spoonfuls of cheesecake mixture over the red velvet batter, then use a knife or skewer to gently swirl through both layers. Avoid over-swirling, which can muddy the distinct marbled pattern. A few figure-eight motions typically create the most attractive marbling effect.
- → Can I use natural food coloring instead?
-
Natural options like beet juice or pomegranate juice can work, though they may produce a deeper burgundy shade rather than bright red. Gel food coloring provides the most vibrant hue with less liquid added to the batter, helping maintain the perfect texture.
- → Why is my cake dense or heavy?
-
Overmixing the batter can develop too much gluten, creating a dense texture. Mix just until combined—some small lumps are fine. Also ensure ingredients are at room temperature before mixing, and avoid opening the oven door during baking which can cause the cake to fall.
- → How should I store leftovers?
-
Keep covered in the refrigerator for up to 4 days. The cheesecake component requires refrigeration for food safety. Serve chilled or bring to room temperature for 20 minutes before serving. The cake can also be frozen for up to 3 months when wrapped tightly.
- → What's the best way to tell when it's done baking?
-
Insert a toothpick into the center—if it comes out with just a few moist crumbs or slight cheesecake residue, it's ready. The cheesecake portion remains slightly creamy even when fully baked. A completely clean toothpick may indicate overbaking. The edges should pull slightly from the pan.
- → Can I make this in a different pan size?
-
A 9x13-inch pan works perfectly for this amount of batter. For round layers, use two 9-inch pans and reduce baking time to 30-35 minutes. A Bundt pan will also work, though the swirl pattern won't be visible. Adjust baking time and check for doneness accordingly.